
JetBrains Rider: The Cross-Platform .NET IDE
Are you looking for a powerful, fast, and versatile .NET IDE that works on Windows, macOS, and Linux? Do you want to develop a wide range of applications using .NET Framework, .NET Core, or Mono? Do you want to enjoy the best features of ReSharper and IntelliJ platform in one tool? If you answered yes to any of these questions, then you should try JetBrains Rider.
Rider is a cross-platform .NET IDE that combines the power of ReSharper, the leading .NET productivity tool, with the rich functionality of IntelliJ platform, the basis of many popular IDEs such as WebStorm, PyCharm, and PhpStorm. In this article, you will learn about the main features of Rider, how to download and install it, and how to get started with it.
Features of Rider
Rider offers a comprehensive set of features that help you write, edit, refactor, test, debug, and run your .NET code. Here are some of the highlights:
Code analysis
Rider boasts over 2,200 live code inspections that detect errors, warnings, suggestions, and hints in your code. You can see the issues in the editor as well as in the Solution Explorer. You can also use the Solution-Wide Analysis feature to monitor the quality of your entire solution. For each issue, Rider provides quick-fixes that let you resolve them individually or in bulk.
Code editing
Rider’s rich editor supports different kinds of code completion and code templates that help you write code faster and easier. You can also use various features such as auto-inserting matching braces and import directives, quick info tooltips and gutter icons for inheritance navigation, context actions, code formatting, and much more.
Refactorings
Rider inherits most of ReSharper’s 60+ refactorings that help you improve your code structure and readability. You can rename, extract methods, interfaces and classes, move and copy types, use alternative syntax, and a lot more. You can also use the Refactor This action to see all the available refactorings for the current context.
Unit test runner
Rider helps you run and debug unit tests based on NUnit, xUnit.net, or MSTest. You can explore tests, group them in different ways, break them down into individual sessions, see test output and navigate to source code from stack traces. You can also use code coverage analysis to see how much of your code is covered by tests.
Debugger and more tools
Rider includes a debugger that works with .NET Framework, Mono and .NET Core applications. You can set breakpoints, watch variables, evaluate expressions, and run to cursor. You can also use other tools such as a stack trace explorer, NuGet browser, VCS support (Git, SVN, Mercurial), database support (SQL Server, Oracle, MySQL), web development tools (HTML/CSS/JS editor), and more
Databases and SQL
Rider helps you work with databases and SQL files in your .NET projects. You can connect to various data sources, such as SQL Server, Oracle, MySQL, PostgreSQL, SQLite, and more. You can explore and manage database objects, run queries, edit data, and generate scripts. You can also use the integrated SQL editor with syntax highlighting, code completion, formatting, and refactoring.
Navigation and search
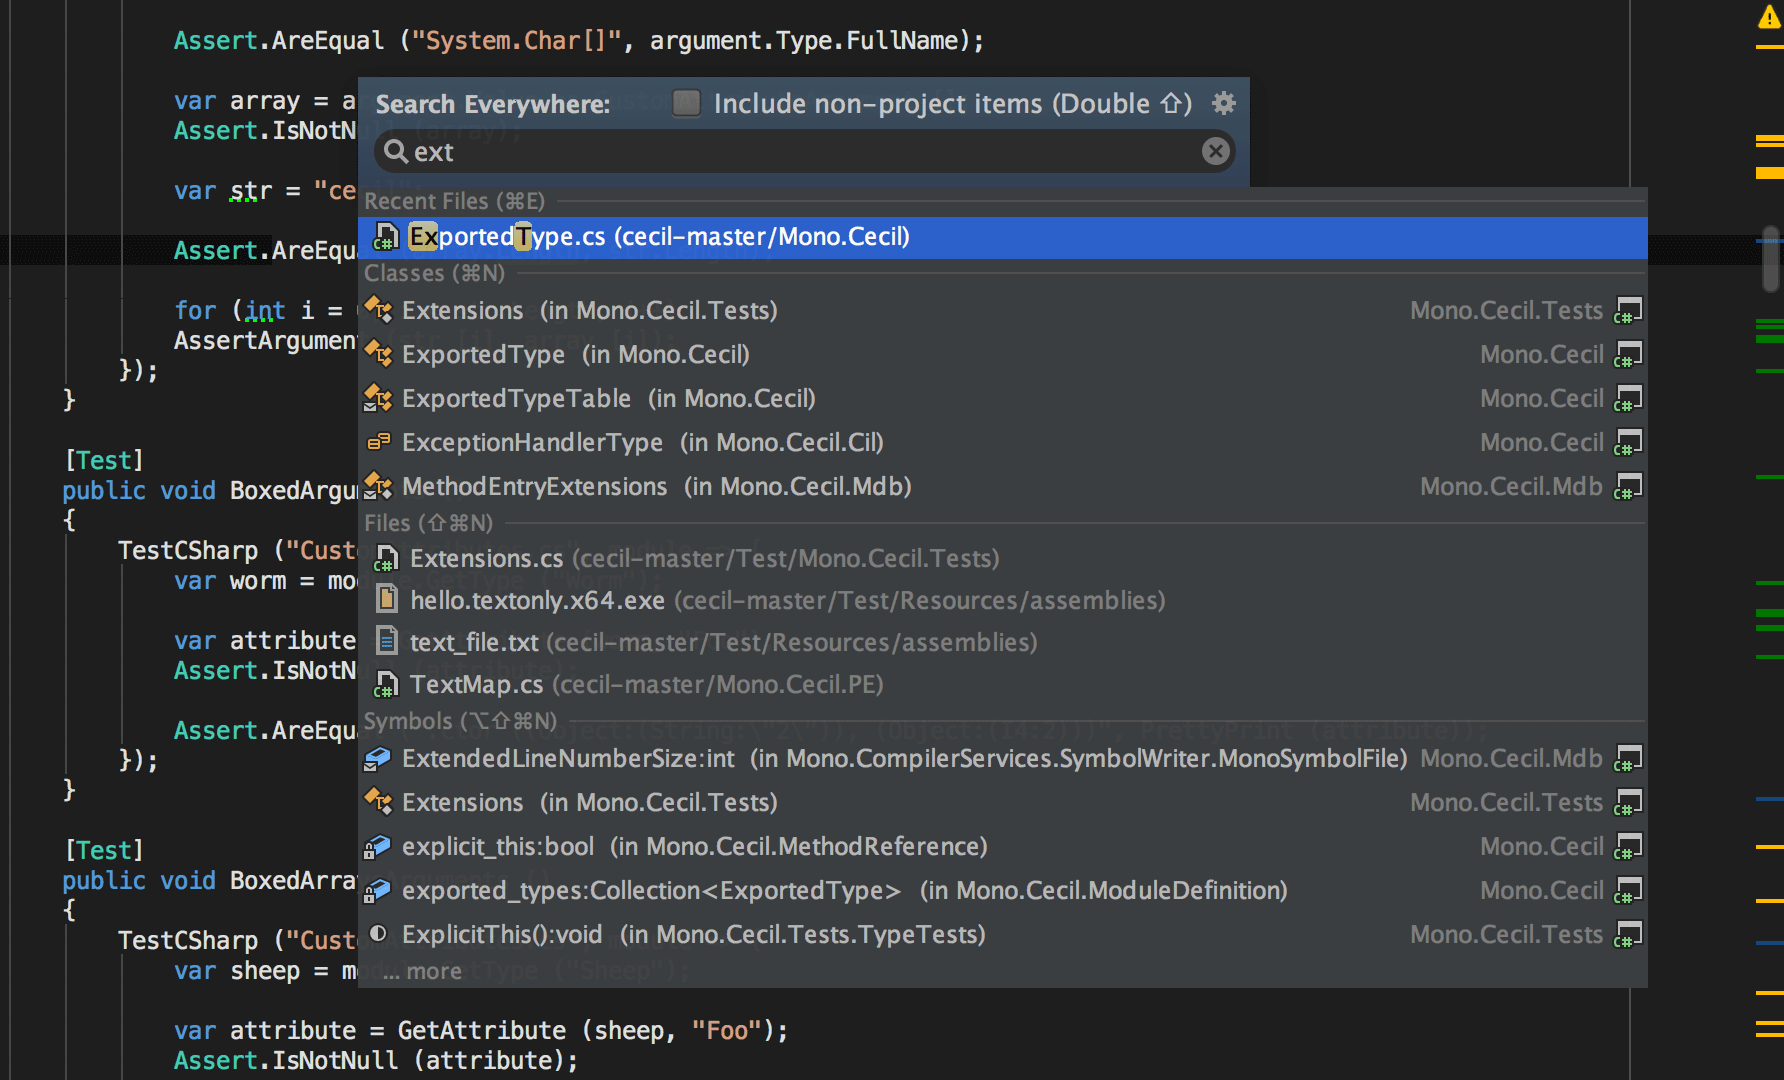
Rider helps you find your way around your code with its powerful navigation and search features. You can jump to any file, type, symbol, or member in your solution using Go to Everything. You can also use Go to Declaration, Go to Implementation, Go to Base Symbols, and other commands to navigate between related symbols. You can also use Find Usages to see where a symbol is used in your code. You can also search for text in files, symbols, actions, settings, and more using Search Everywhere.
Front-end technologies
Rider supports web development with various front-end technologies, such as HTML, CSS, JavaScript, TypeScript, React, Angular, Vue.js, and more. You can enjoy code completion, syntax highlighting, code analysis, refactorings, debugging, and testing for these languages. You can also use the built-in web server or configure an external one to run your web applications.
How to download and install Rider
If you are ready to try Rider on your machine, here are the steps you need to follow:
System requirements
To run Rider, you need a computer that meets the following requirements:
- Operating system: Windows 7 or higher (64-bit), macOS 10.13 or higher (64-bit), Linux (64-bit)
- Memory: 4 GB of RAM minimum (8 GB recommended)
- Disk space: 2.5 GB of disk space for installation (5 GB recommended)
- Display: 1024×768 minimum screen resolution (1920×1080 recommended)
- .NET Framework: .NET Framework 4.6.1 or higher for Windows
- Mono: Mono 5.4 or higher for Linux and macOS
Download options
You can download Rider from the official JetBrains website. There are two options available:
- The latest stable release: This is the most recent version of Rider that has been tested and verified by JetBrains. It contains all the features and bug fixes that have been released so far.
- The early access program (EAP) build: This is a preview version of Rider that contains the latest features and improvements that are still under development. It may be unstable or have some issues. It is recommended for users who want to try the newest features and provide feedback to JetBrains.
Installation steps
Once you have downloaded the installer for your operating system, you can follow these steps to install Rider:
- Run the installer and follow the instructions on the screen.
- Choose the installation location and the components you want to install.
- Wait for the installation to finish.
- Launch Rider from the Start menu (Windows), Applications folder (macOS), or command line (Linux).
- Activate Rider with your JetBrains account or license key.
- Choose your preferred UI theme and keymap scheme.
- Enjoy Rider!
How to get started with Rider
Now that you have installed Rider, you may wonder how to use it for your .NET projects. Here are some tips to help you get started:
Creating a project
To create a new project in Rider, you can use the New Project wizard that guides you through the process. You can choose from various templates for different types of applications, such as console, web, desktop, mobile, and more. You can also specify the project name, location, and settings.
To open an existing project in Rider, you can use the Open Solution or Project action that lets you browse and select the project file or folder. You can also use the Recent Projects list to quickly access the projects you have worked on before.
Exploring the user interface
The main window of Rider consists of several parts that help you work with your code and tools. Here are some of the main elements:
- The editor: This is where you write and edit your code. You can open multiple files in tabs and split the editor into multiple panes. You can also use various features such as code completion, code analysis, refactorings, and more in the editor.
- The toolbar: This is where you can access common actions such as running, debugging, testing, and version control. You can also customize the toolbar to add or remove buttons.
- The tool windows: These are panels that provide additional functionality for your code and tools. You can dock, undock, hide, or resize them as you wish. Some of the tool windows are Solution Explorer, Unit Tests, Database, Terminal, and Debug.
- The status bar: This is where you can see information about your project and IDE state, such as errors, warnings, progress, memory usage, and more. You can also access some settings and actions from the status bar.
Configuring settings
Rider allows you to customize various aspects of the IDE to suit your preferences and needs. You can access the settings from the File | Settings menu (Windows and Linux) or Rider | Preferences menu (macOS). Some of the settings you can configure are:
- Editor: You can change the appearance, behavior, and options of the editor, such as fonts, colors, indentation, code style, code inspection severity, and more.
- Keymap: You can change the keyboard shortcuts for various actions in the IDE. You can also choose from different keymap schemes or create your own.
- Plugins: You can manage the plugins that extend the functionality of the IDE. You can install, update, enable, disable, or uninstall plugins. You can also browse and download plugins from the JetBrains Marketplace.
- Other settings: You can configure other aspects of the IDE such as appearance and behavior, system settings, languages and frameworks, tools, version control, and more.
Conclusion
In this article, you learned about JetBrains Rider, a cross-platform .NET IDE that combines the best features of ReSharper and IntelliJ platform. You learned about its main features, how to download and install it, and how to get started with it. You also learned how to create a project, explore the user interface, and configure settings in Rider.
If you want to learn more about Rider and how to use it for your .NET development needs, you can visit the official website, read the documentation, watch the videos, or join the community. You can also try Rider for free for 30 days and see for yourself how it can boost your productivity and enjoyment of coding.
Frequently Asked Questions
- What is JetBrains Rider?
Rider is a cross-platform .NET IDE that combines the power of ReSharper with the rich functionality of IntelliJ platform. - What are the benefits of using Rider?
Rider offers a comprehensive set of features that help you write, edit, refactor, test, debug, and run your .NET code faster and easier. It supports a wide range of applications using .NET Framework, .NET Core, or Mono. It also supports various front-end technologies such as HTML, CSS, JavaScript, TypeScript, React, Angular, Vue.js, and more. - How much does Rider cost?
Rider is available under different subscription plans for individuals, organizations, and students/teachers. You can see the pricing details on the official website. You can also try Rider for free for 30 days before buying it. - How do I update Rider?
Rider notifies you when a new version is available and prompts you to download and install it. You can also check for updates manually from the Help | Check for Updates menu. You can also configure the update settings from the Settings | Appearance & Behavior | System Settings | Updates menu. - How do I get support for Rider?
You can get support for Rider from various sources, such as the documentation, the blog, the forum, the issue tracker, the Twitter account, and the feedback form. You can also contact the support team via email or chat.
bc1a9a207d
0 Comment on this Article